What Is Report Center And How To Use It
| Time to read: 15 minutes
From the moment you ask your special guy to create a new report, how long does it usually take before you can use it?
Days? Hours?
With our new Report center, it will take minutes!
You might even consider giving your special guy some other tasks to do while you create your own reports yourself.
1. Getting started with the Report Center
We could use fancy words to talk about how important it is to discuss the report with your team and define the goal of the report first – but if you need a report, you have already completed this step.
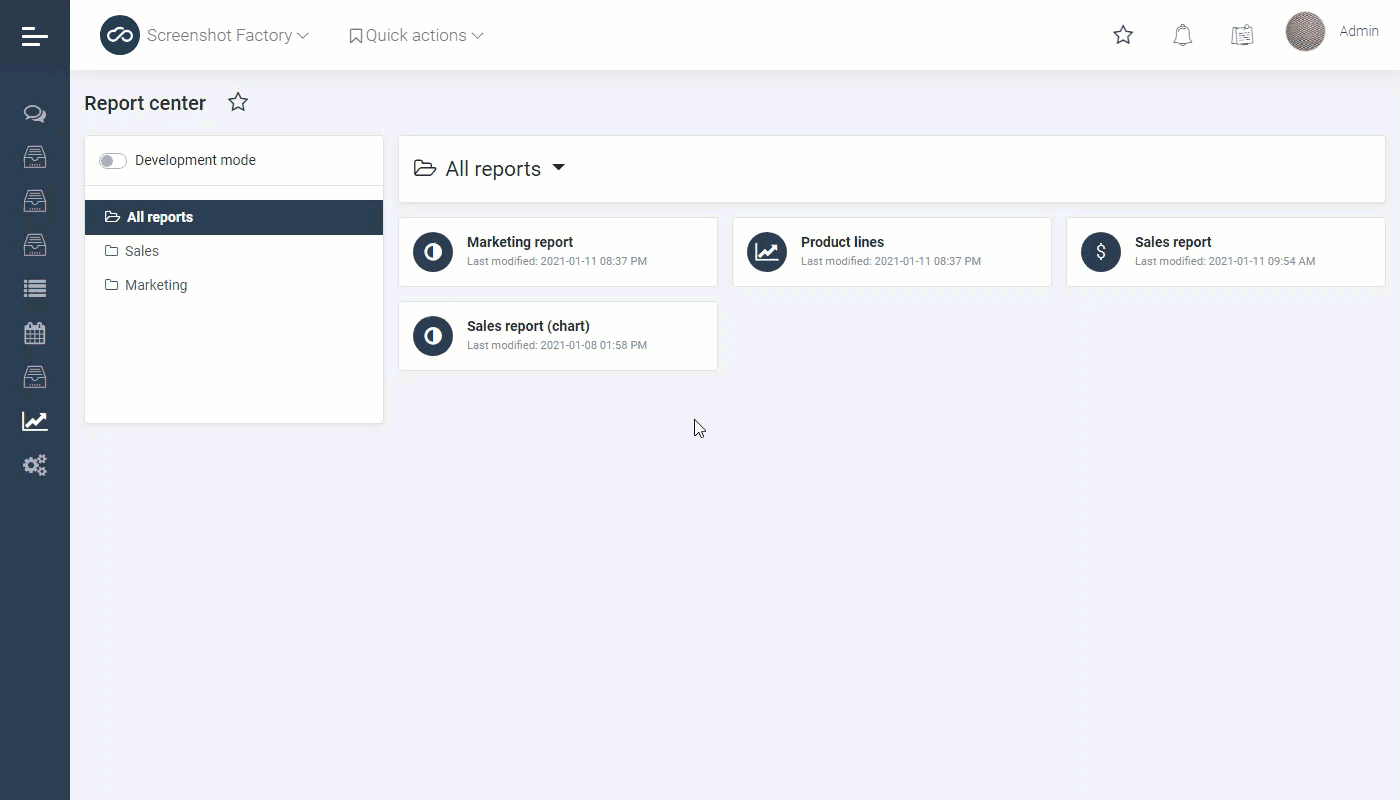
In your app, navigate to Report center in the Navigation menu.
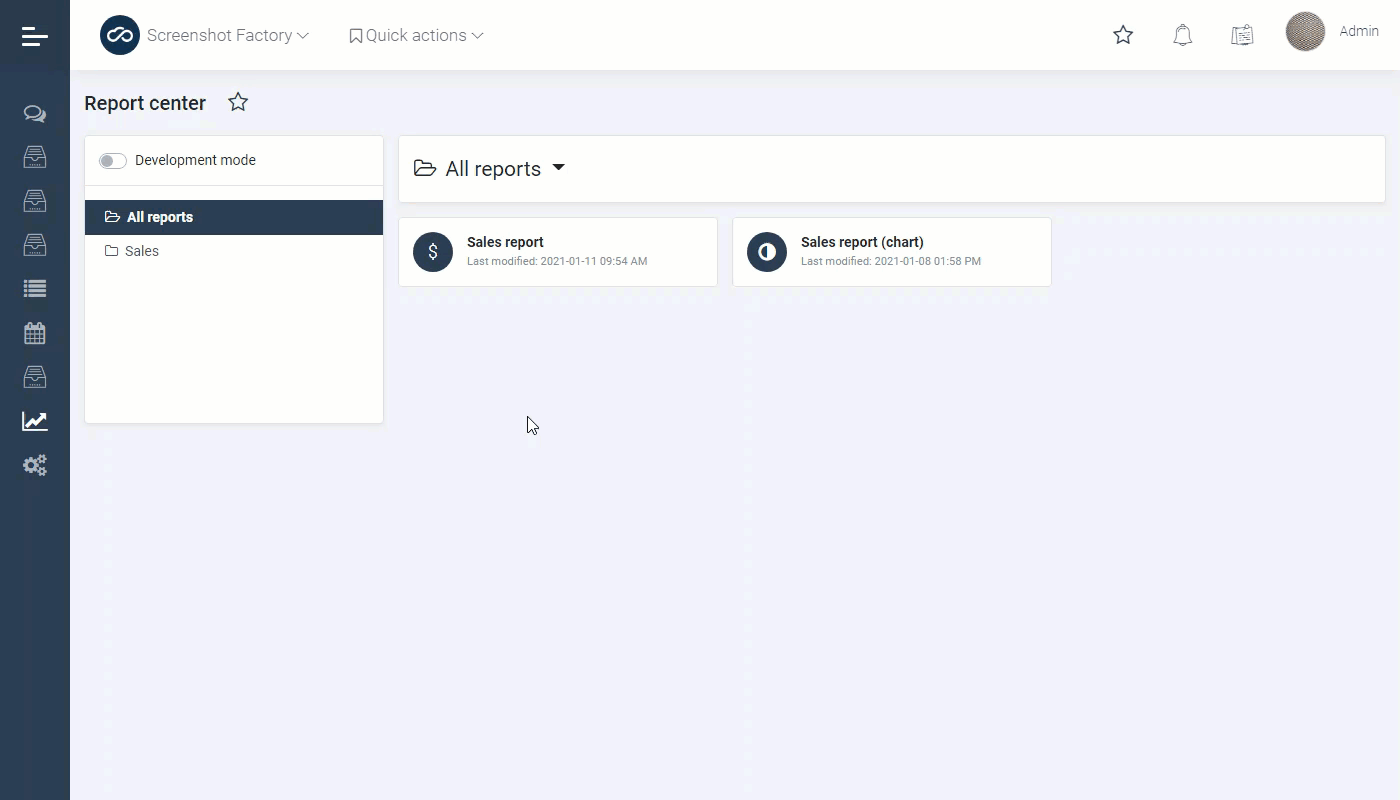
If you open Report center for the first time, you will see all reports that the application vendor developed for you. From this interface you can open the existing reports, export the data, and do everything else as usual.
If your access allows, you will see a switch to enable the Development mode. This is where you set the input for reach Report before others see it. (As you will see below, you need to assign each Report to a group - if not, it will not be visible in User mode, which is where people can see existing reports.)
Let’s dive in and get our hands dirty.
2. Development mode
In this mode you can:
Create, edit, delete, reorder groups of reports. For example, you can have separate folders for Sales Reports, Marketing Reports, or any other category.
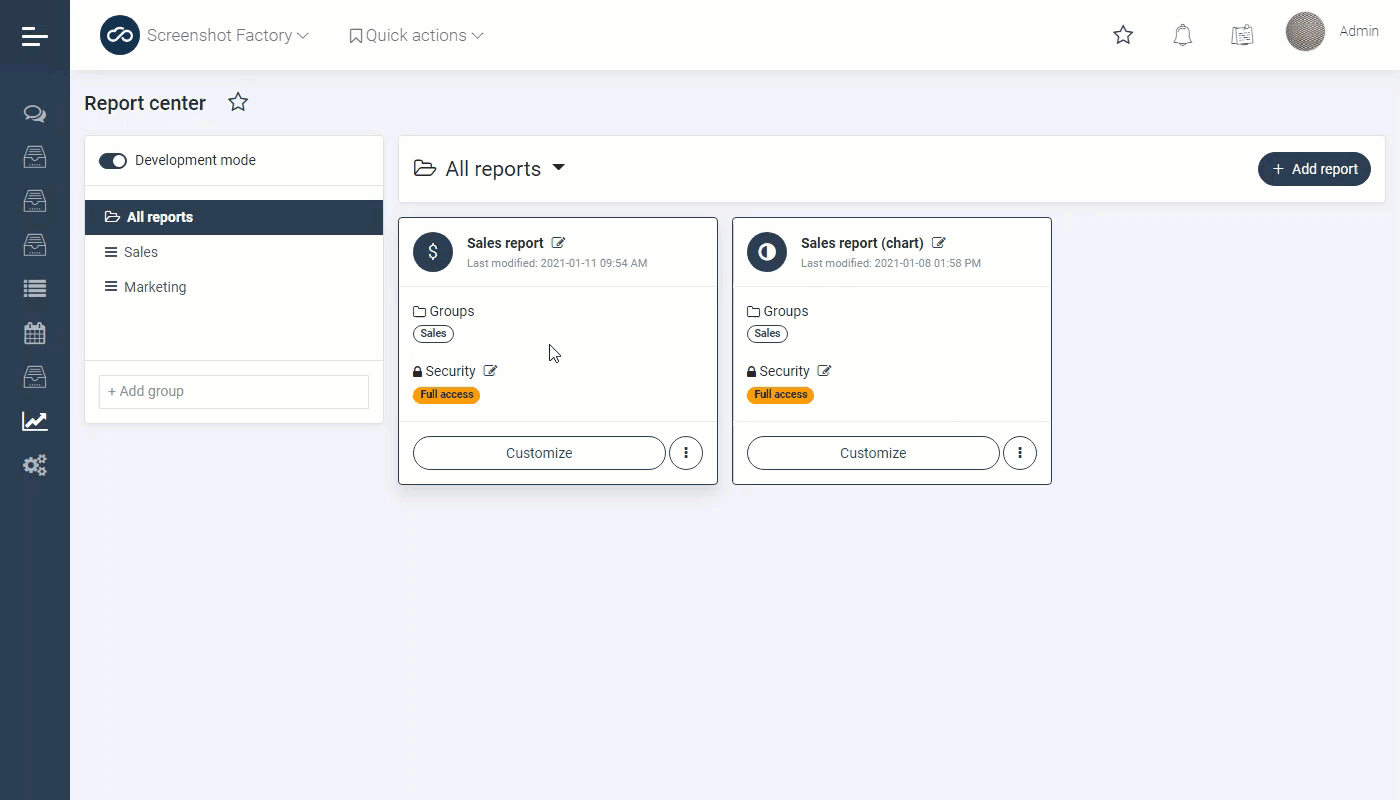
Reorder reports inside the group to better suit your team’s needs.
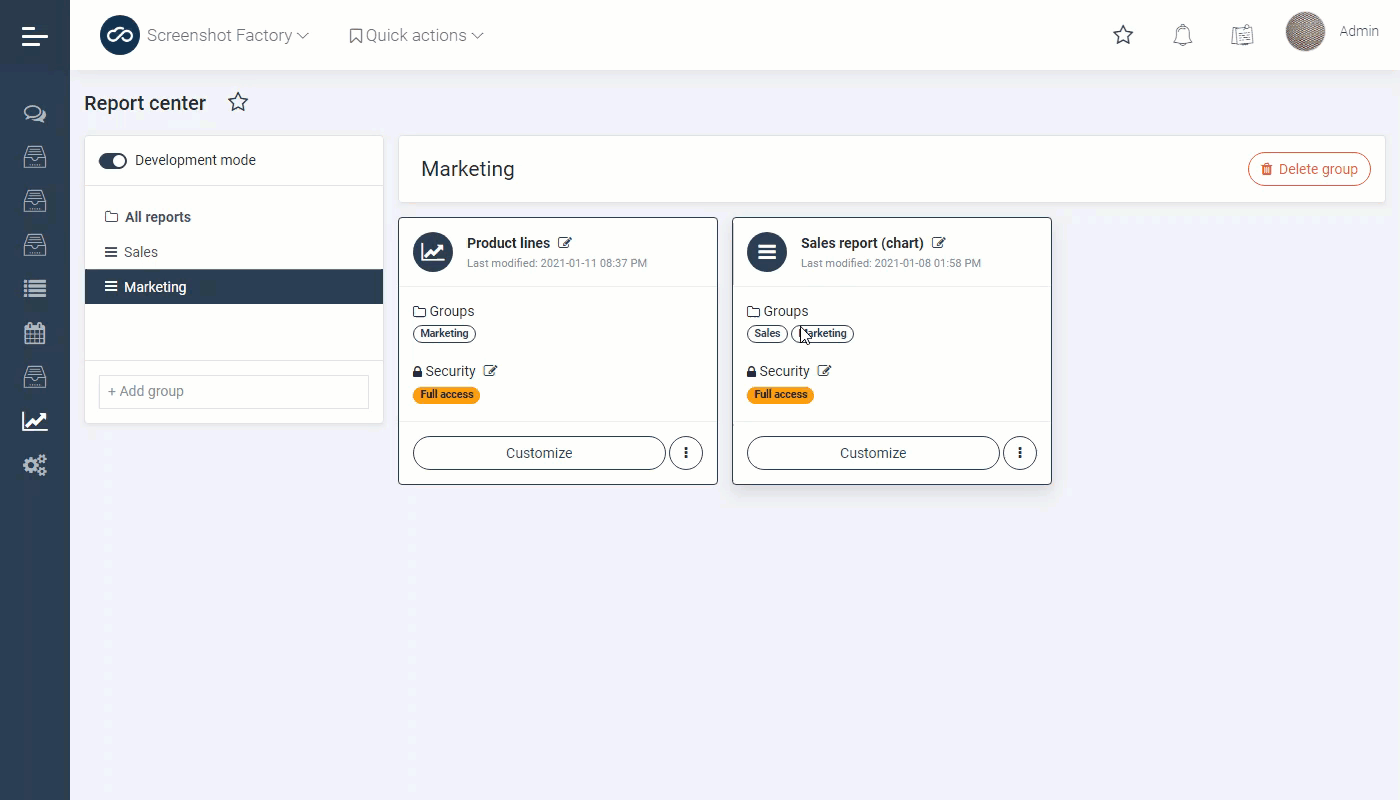
Assign reports to different groups. The same report may be in several groups at the same time.

And, of course, you can create new ones and modify the existing reports.
3. Report builder
There are two ways to create a report:
- Build it from scratch
- Replicate an existing one and customize it
The second option is much easier to start with, especially if you just need to add a couple of extra fields to an existing report.
Note that you cannot modify the reports provided by the application vendor – but you can duplicate them and modify the copies.
If this is your internal application and you have access to the Application builder, you will be able to modify everything, but you will probably need some help from your special guy to do that.
Let’s start with something simple. You almost certainly have a list of clients in your application – so let’s create a simple report based on this list.
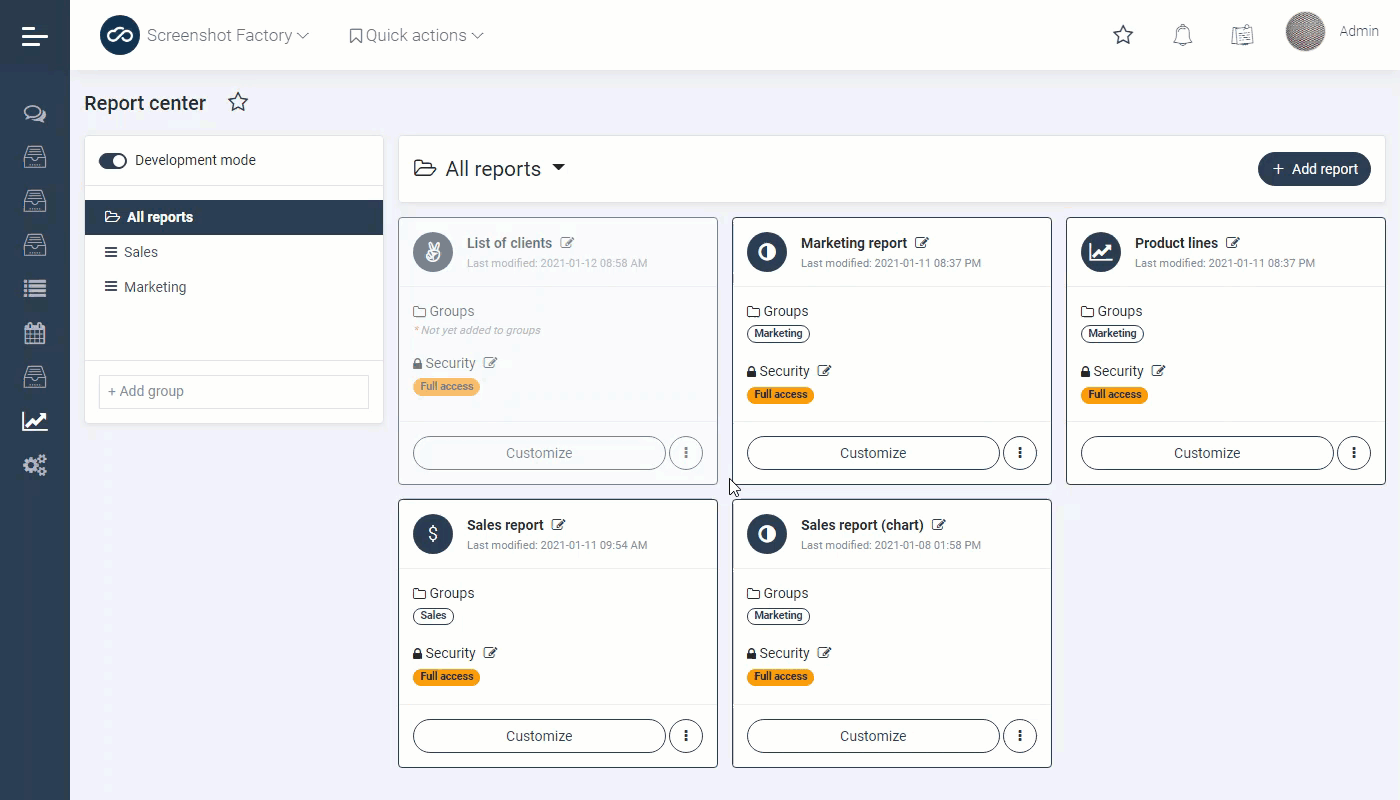
Navigate to All reports and click the Add report button.
Enter name, icon, and hit Save.
Right away, you can set the security parameters for this Report, controlling who can see it (or not) and who can export it (or not).
You can change these parameters by clicking on the small pencil icon next to Security.
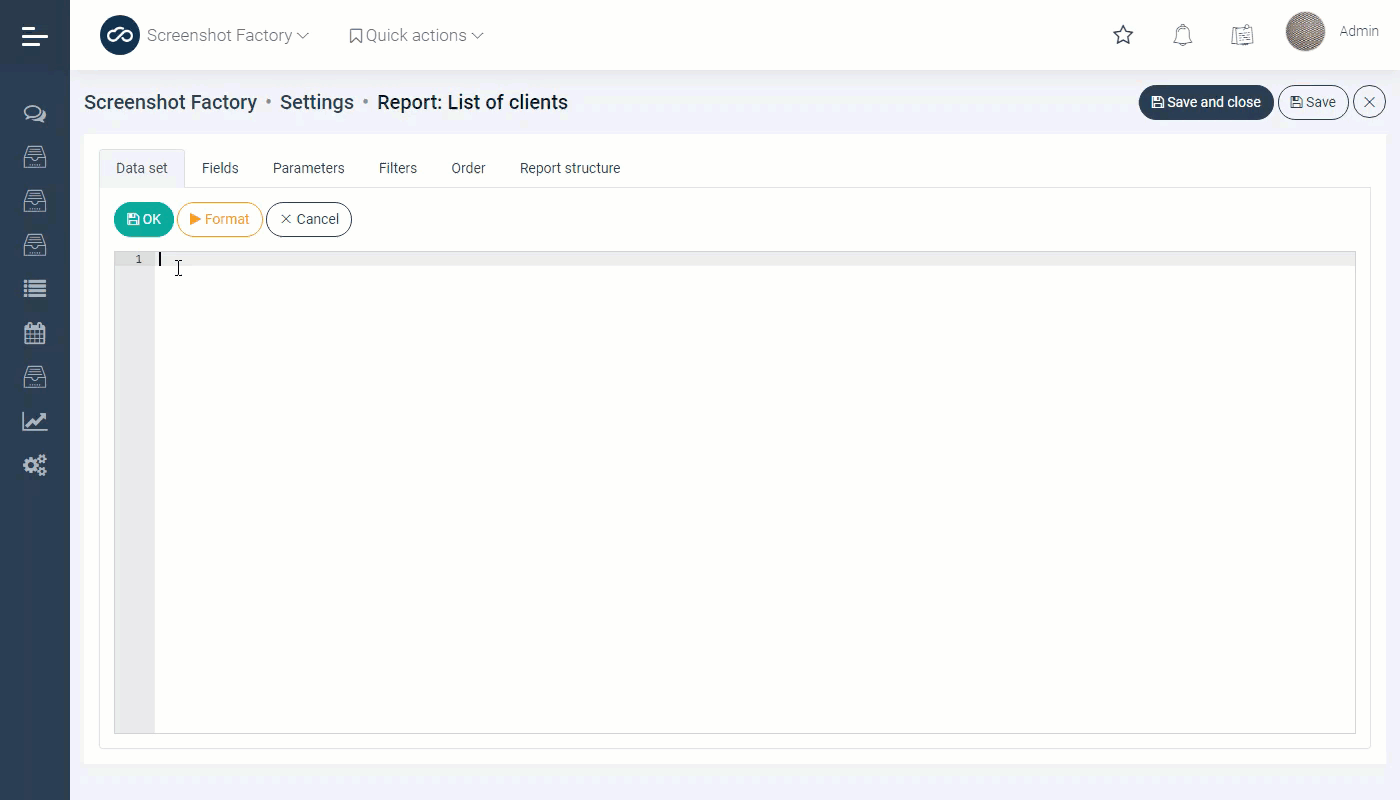
Now, hit the Customize button.
Data set
Describe your data set with SQL.
SQL (Structured Query Language) is a query language (not a programming one) that helps you get interesting or relevant data from databases. It mimics English, so that anyone who can use basic English can learn how to write SQL queries.
It is easier to use than you might think, especially with context tips.
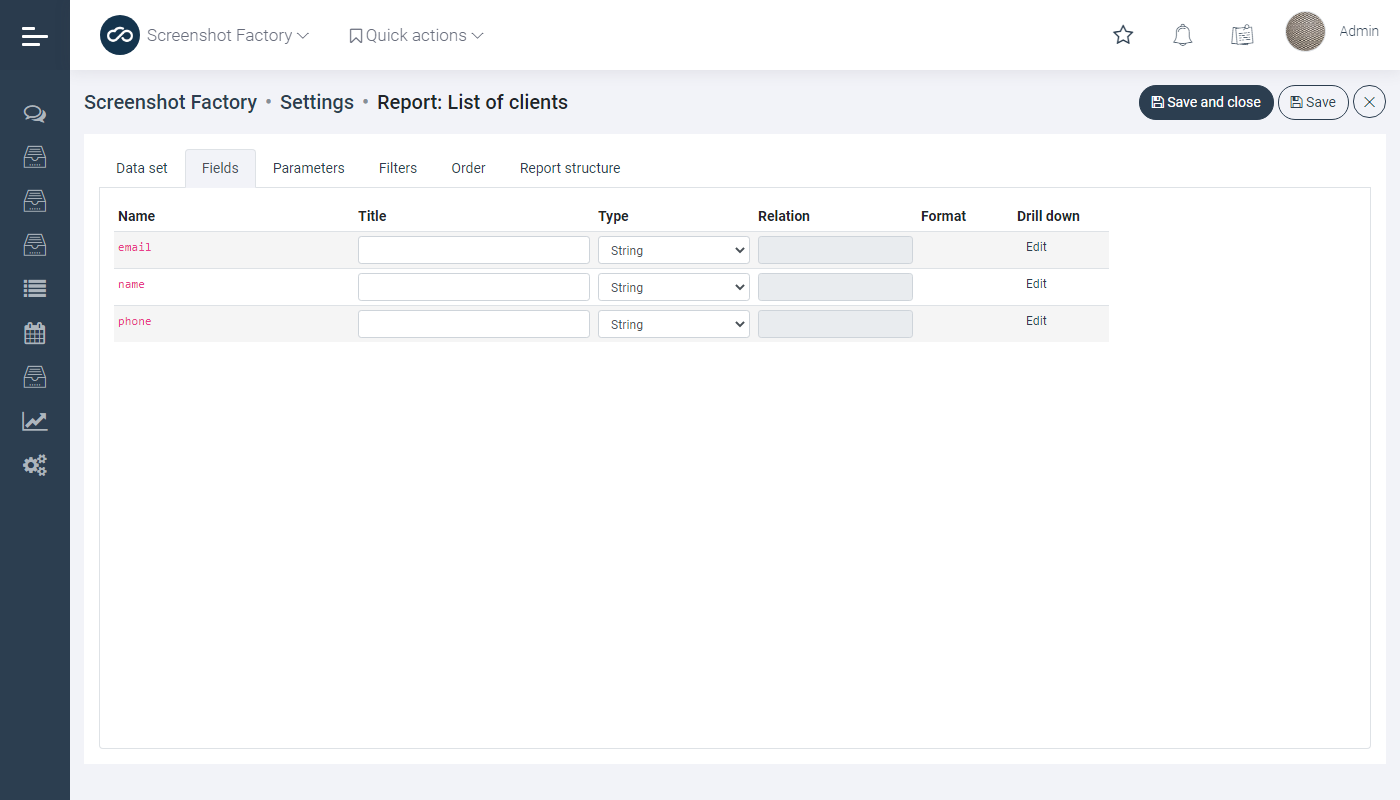
Fields
This is what you will actually see in the Report itself – and the list is populated based on your Data set. You can define the titles of the columns, types, and the format of the data and even the drill-down parameters (these are parameters that will be visible in your Report – and you can click on them for more detailed data).
Parameters
These are usually predefined filters or any other parameters you used in your data set. In this case, because you are just creating a list of clients, there are no parameters.
(On the other hand, if you were creating a Report with sales for given time period, you would set Start Date and End Date as your parameters.)
Order
As you may have guessed, here you define how the data in your report will be sorted.
Report structure
Here, you can specify what the Report will look like: if it will be a table or a graph, the fields that will show up, and how data is grouped together (or not) in the Report – for example, whether the Report shows you one total sum for all of your sales, or a separate total per client.
The Theme tab allows developers to create different visual themes for the report.

When you hit Save and close, you will be taken back to your All reports menu. Click on the 3 dots icon (at the bottom right) of a particular Report, then on Open report.
Here, you can test what your Report will look like (and make changes, if necessary) before going live with the Report.
What your Report will look like
Each Report will show the data you requested, in the visual format you input or specify.
For example, the Report we have been developing here - with the list of clients - will be a table with all of the data neatly presented in 3 columns: name, telephone number, and e-mail address.
Any other Report will likewise follow the data and visual display that you specify while creating it (c.f. Report structure above). You have control over both the data that gets included and the visual presentation of the report
Why did we make the Report center available in the user interface?
With input from our clients, we have decided to create this in the user interface in order to give them control over their own data and have their own reports ready in minutes.
Having access to the Report center in the user interface eliminates the headache of going into the Application builder (or getting someone else to do so).
Just one of many examples of how we`re always here to make your life easier!
What about mobile users?
Well, we never forget about them!
Report center is also available in the mobile version of your application. There is no development mode in mobile, but you can run reports created in Web mode, to get some of the same convenience right at your fingertips.
What next?
Create your reports, customize the existing ones, share them (if you wish) – get the most out of YOUR data!
Are you the special guy we mentioned in the beginning? Don’t worry, we have a lot of other exciting features on the way. Stay tuned.