Triggers
Updated on Oct 12, 2022 14 minutes to readOverview
As previously mentioned, triggers are akin to the nervous system of your business app, responding in a specific manner when certain conditions are met.
Every8.Cloud supports two types of triggers: triggers created at the application level in the Application builder, and user-created triggers at the Implementation Layer level. In this article, we will discuss the conceptual component of triggers and the second type of triggers, created at the Implementation layer level.
Rules
To understand the purpose of triggers, let's consider the concept of conditions for executing a trigger.
With a certain degree of abstraction, it can be said that any business application is a set of appropriately structured data. In other words, by conditions, we always mean one of the following operations on a data object:
- Update and insert
- Update
- Insert
- Delete

Another important property of a trigger is the timing of its execution. A trigger can be executed immediately, with a certain delay, before an event occurs, and after.
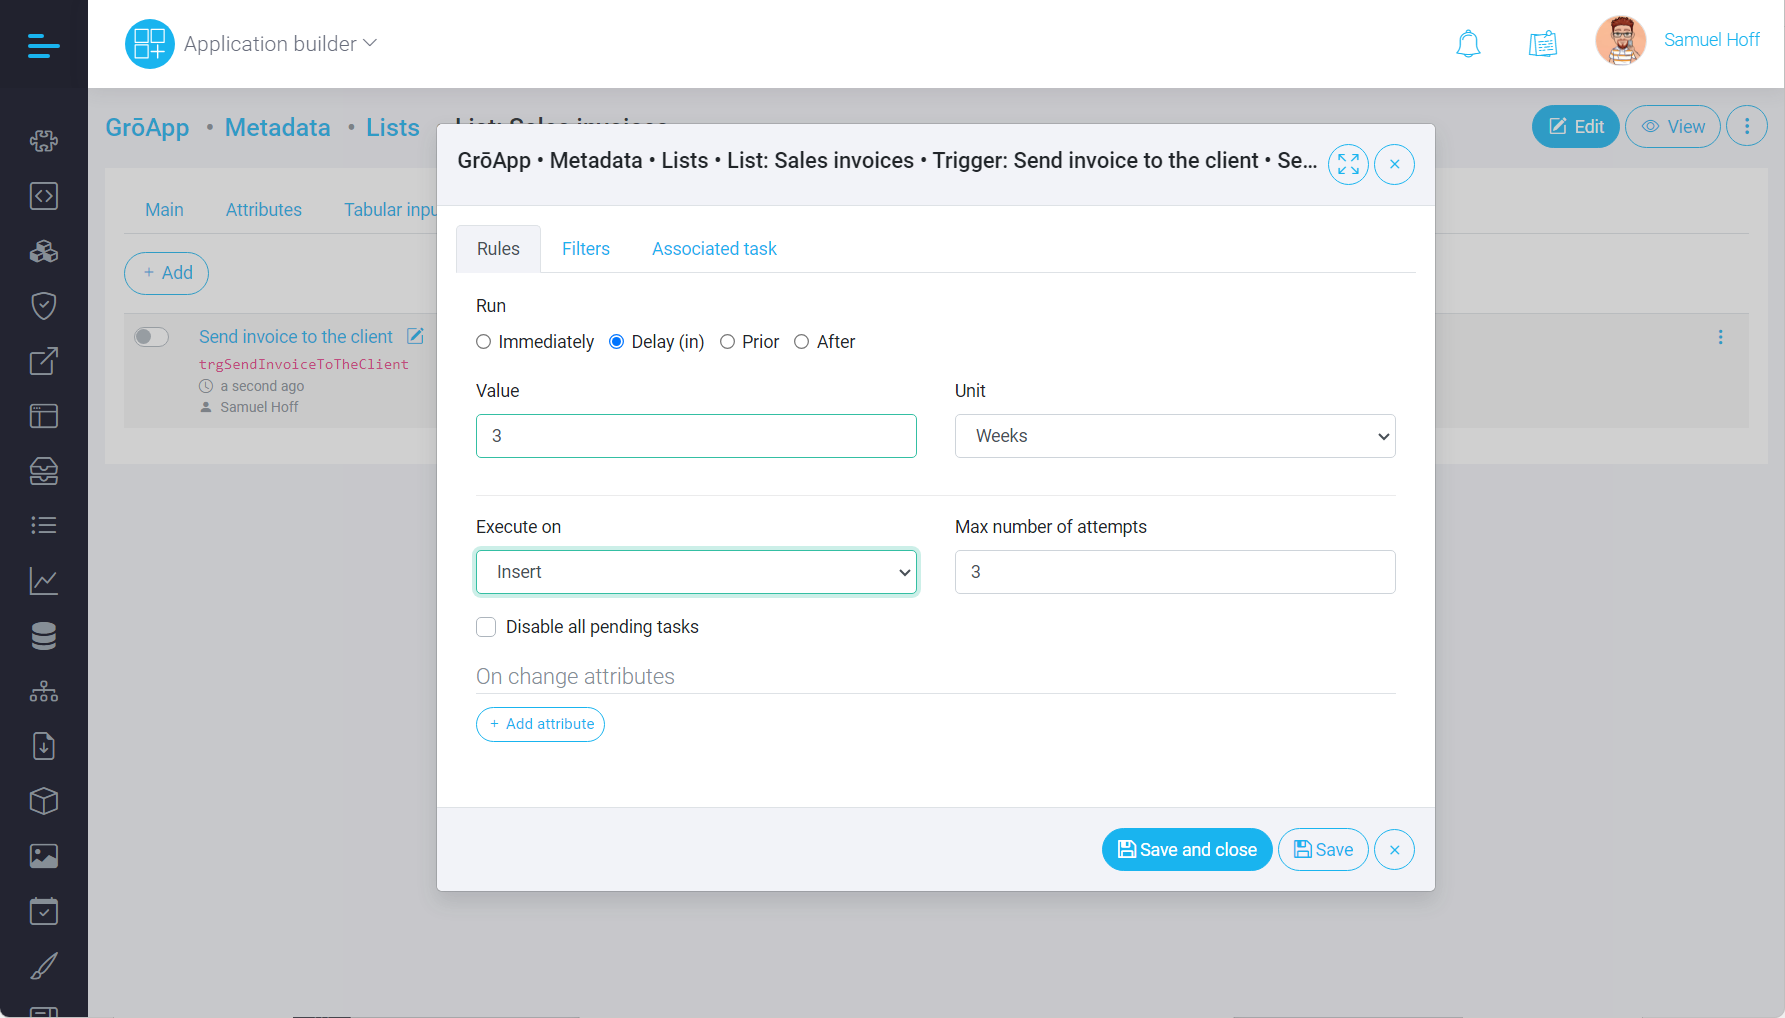
The following example illustrates the execution of certain actions with a 3-week delay. As an example, we can assume that we want to send a notification to the client 3 weeks after creating an invoice. This trigger will create a task for execution in 3 weeks when a new invoice is added to the system.
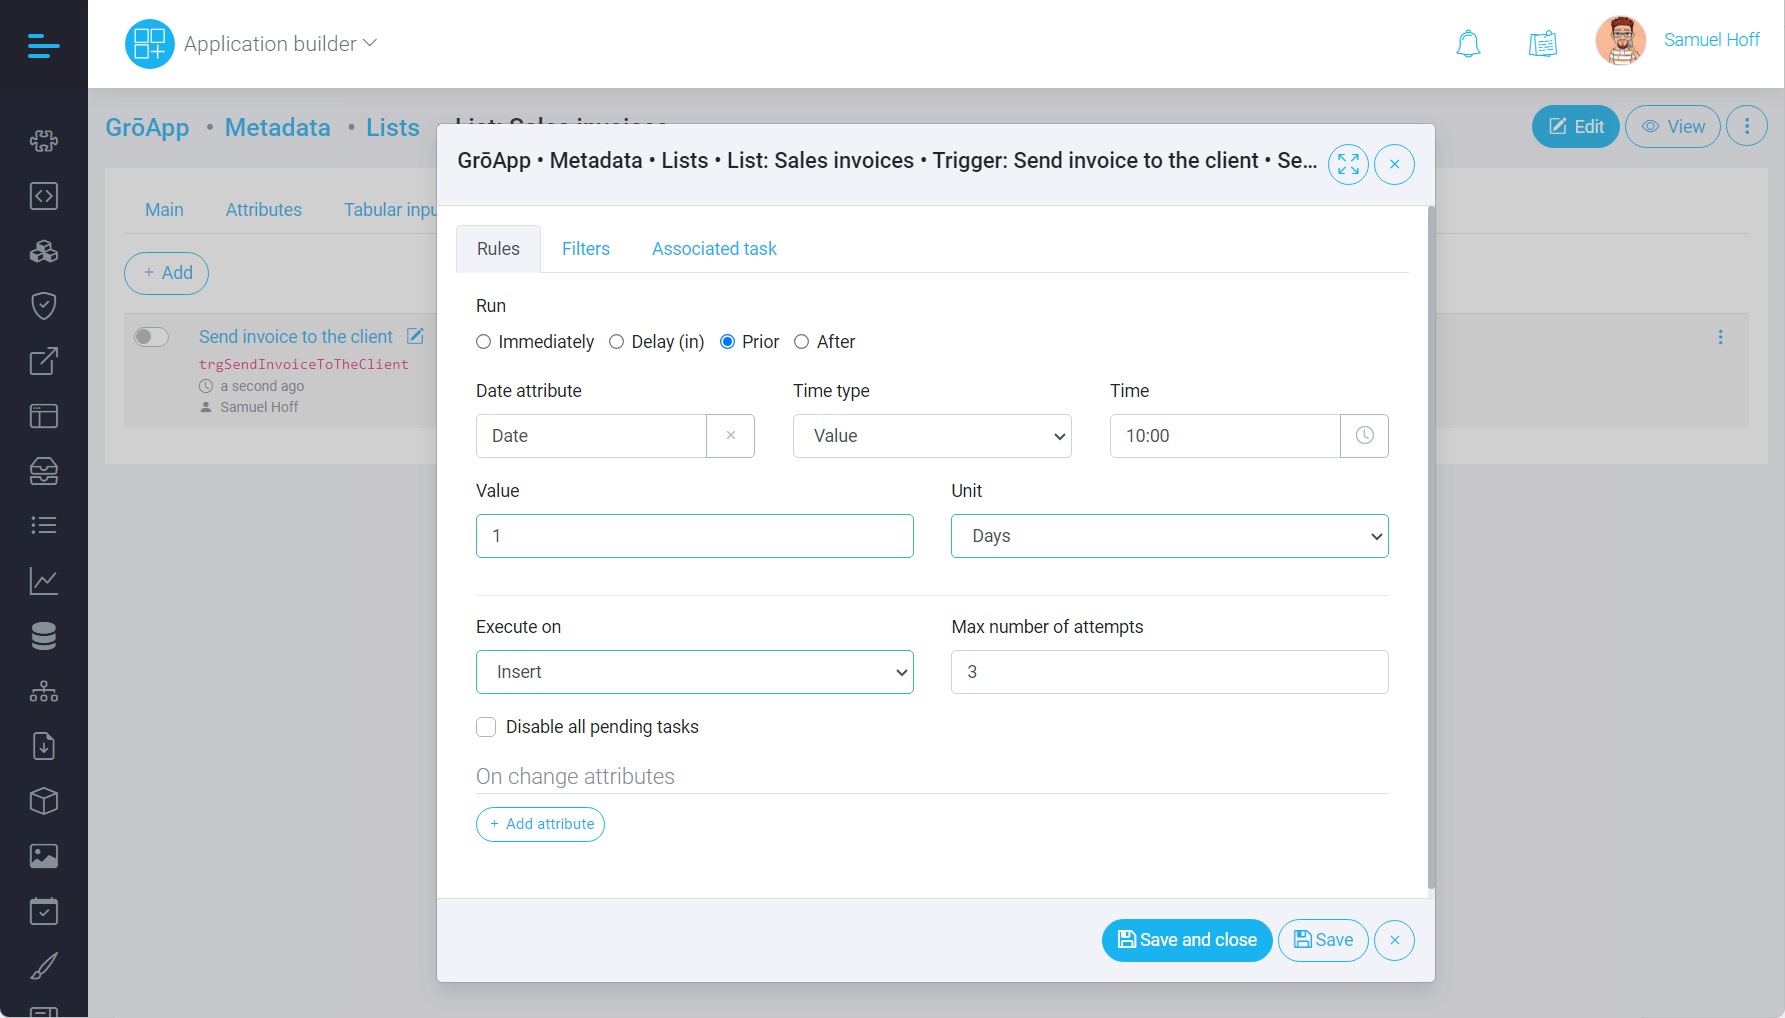
The following trigger will be executed one day before the date. This example doesn't make much practical sense for an invoice, but it can be very useful if you want to program the sending of a notification to a client one day before a certain date (appointment date, last day of invoice payment, etc.).
The time of sending can be specified manually as well as from the data object attribute. If you want to send a notification to a client a day before the scheduled date, there's a chance the automatic email will be sent at night. The client may not appreciate such attention. For this, there is an option to manually specify the trigger time. In this example, the notification will be sent at 10 am, one day before the date contained in the Date attribute.
The following trigger will work very similarly to the previous one, with one difference: it will be executed after a certain event occurs. For example, if you want to send a 'Thank You' letter to a client a day after signing a contract.

For a proper understanding of how to create triggers, it is important to understand how they function at the platform level.
Suppose we create a trigger to send a notification three weeks after creating an invoice. One might think that the system checks all invoices at certain time intervals and sends a notification if an invoice is found whose date meets this condition. Of course, this is not the case. Such a procedure would be costly and could significantly impact system performance especially as the number of triggers increases.
So what happens when an invoice is created and there's a trigger to send a notification in three weeks?
When the invoice is created, the platform generates a task to be executed in three weeks. Three weeks later, the platform will not be analysing all existing invoices in the system, but will simply carry out the task created three weeks ago.
But what if some events occur that affect our intentions to execute this trigger?
For instance, when scheduling a reminder notification to a client three weeks after creating an invoice, it might happen that the invoice is already paid after three weeks and the notification becomes meaningless. Also, a thank you letter the day after signing a contract won't make sense if the client retracts their signature for some reason. A meeting notification a day before a meeting planned three weeks ago makes no sense if the client calls and requests to reschedule the meeting a week earlier. When rescheduling the meeting date, the task for the trigger has already been created and will be executed a day before the initially scheduled date.
Let's look in more detail at the example of sending a notification a day before the scheduled meeting date. The following trigger will be executed on creating or updating of a data object and will create a task to be executed the day after the date specified in the Date attribute. The task for the trigger will be ran at 10am.
The Disable all pending tasks parameter will remove all already created tasks for this trigger for this data object. In other words, if a client calls and requests to reschedule the meeting for a week, the user modifies the data object, which triggers the deletion of the tasks created before this trigger, and the creation of a new task with the correct data for execution.
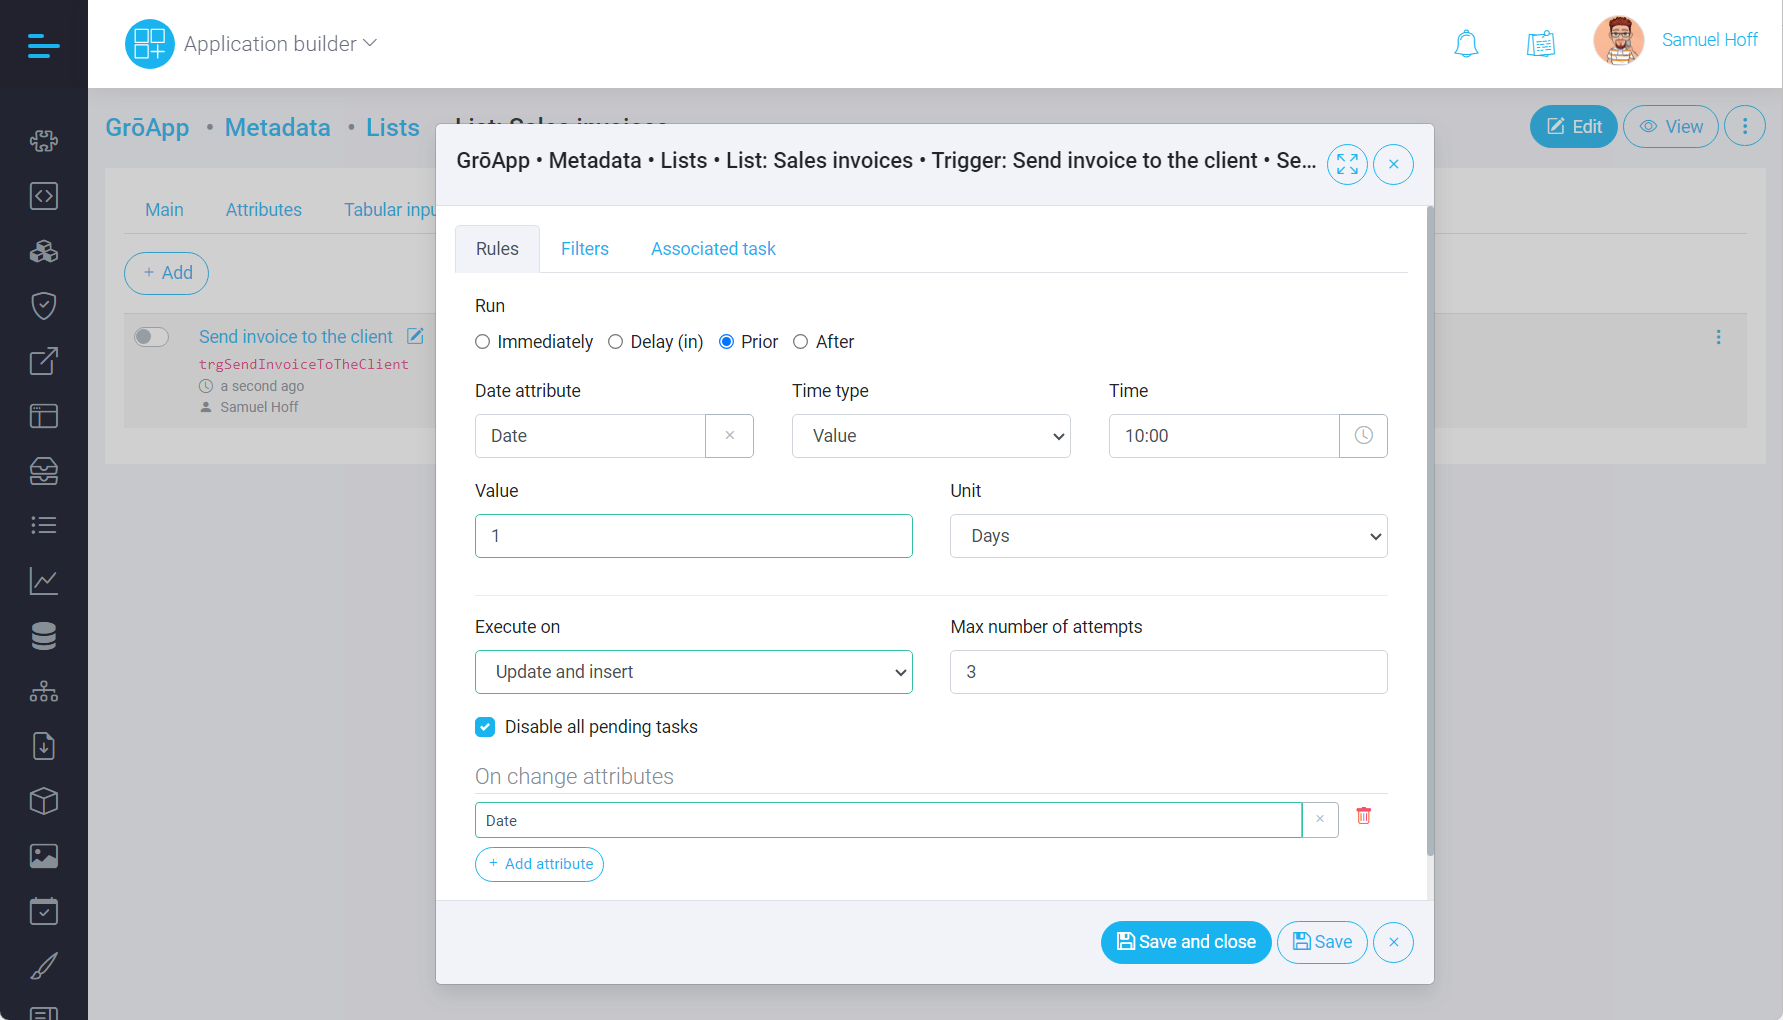
This trigger will also only execute when the attribute Date is changed. That is, if a client called and the user changed the address in the database, a new task will not be created.
Why might this be useful?
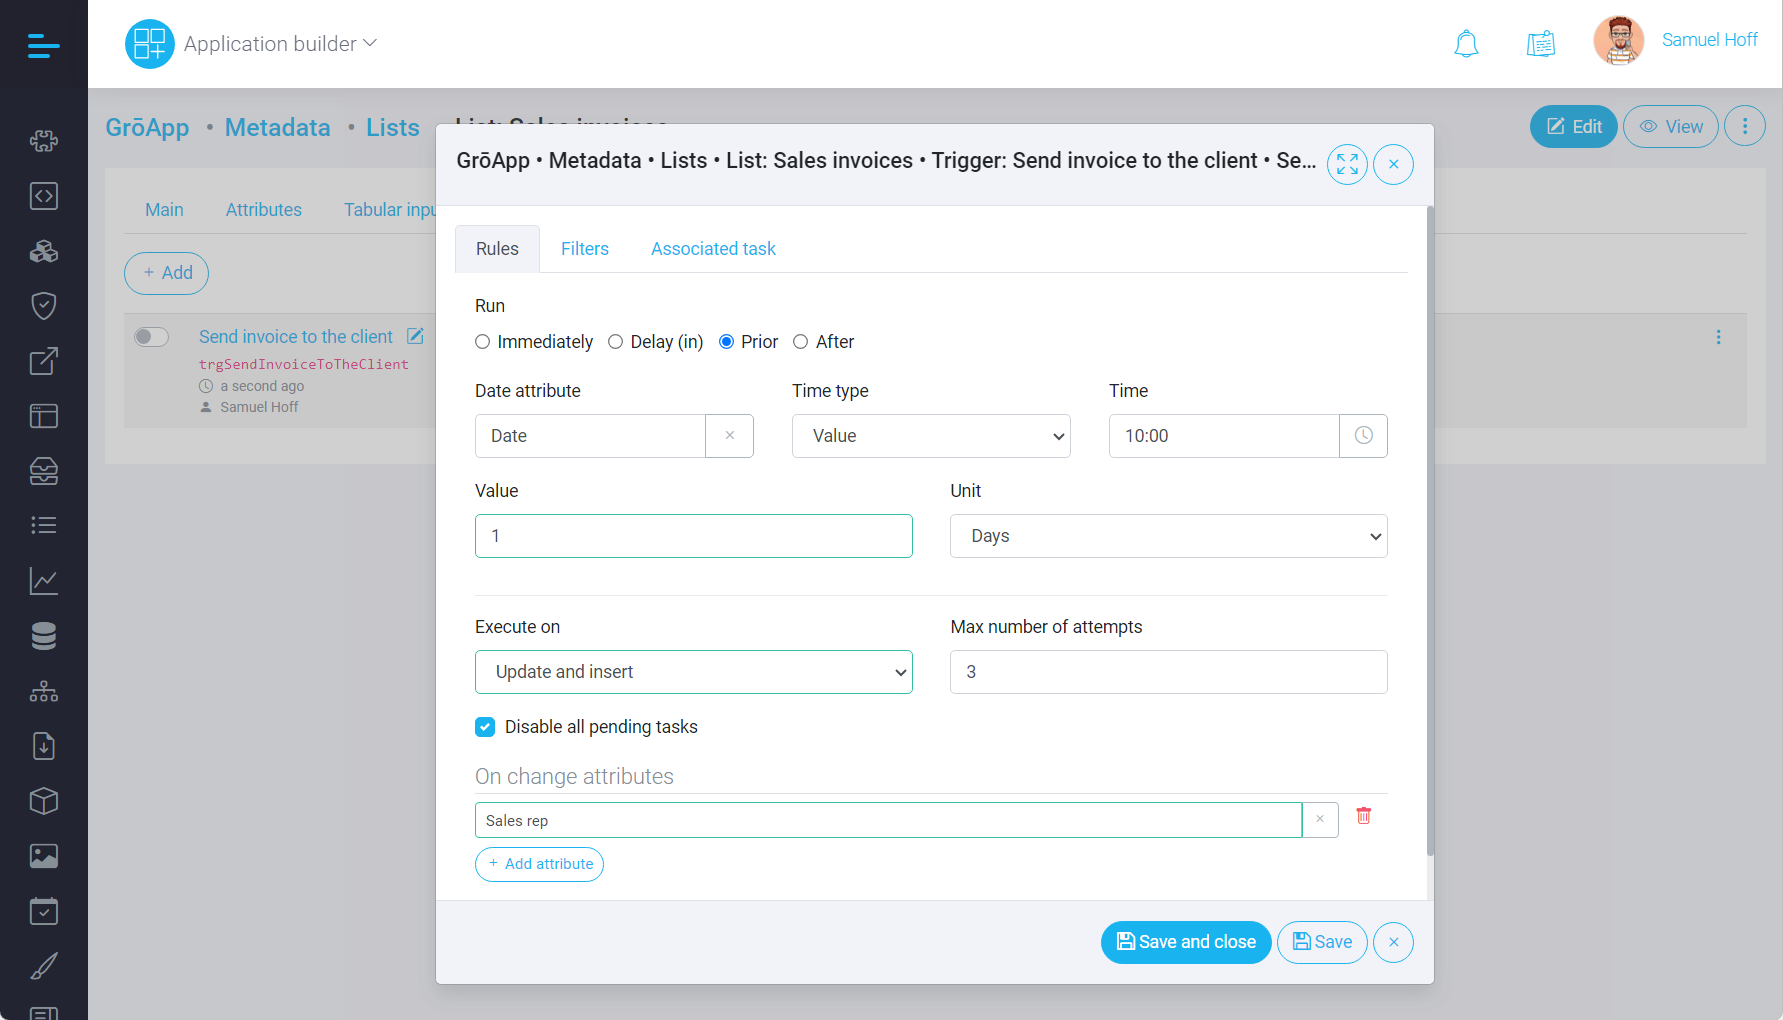
For instance, in this case, a notification will be sent when the attribute Sales rep is changed. This could be useful if we want to notify the client about the change.
The last thing worth noting in this section is the parameter Max number of attempts. This parameter determines the maximum number of trigger execution attempts.
What does this mean?
If the result of the trigger is a sent email, the platform will attempt to send it three times. If you have incorrectly entered the password in your email profile or the mail server is unavailable, after three attempts, the system will stop trying to send it. If your trigger launches a Webhook to connect to a remote system and it is unavailable, the platform will also carry out a pre-determined number of attempts. After this, the task related to the trigger will attain the status of Failed. Details about the errors will also be logged in the System log.
Filters
To understand this aspect of trigger setup, let's return to our example of sending a notification when the Sales rep attribute is changed. The notification should be sent when this attribute is changed, but only under one condition: it must be filled. If we remove the sales representative from the data object, we do not want to send a notification about it.
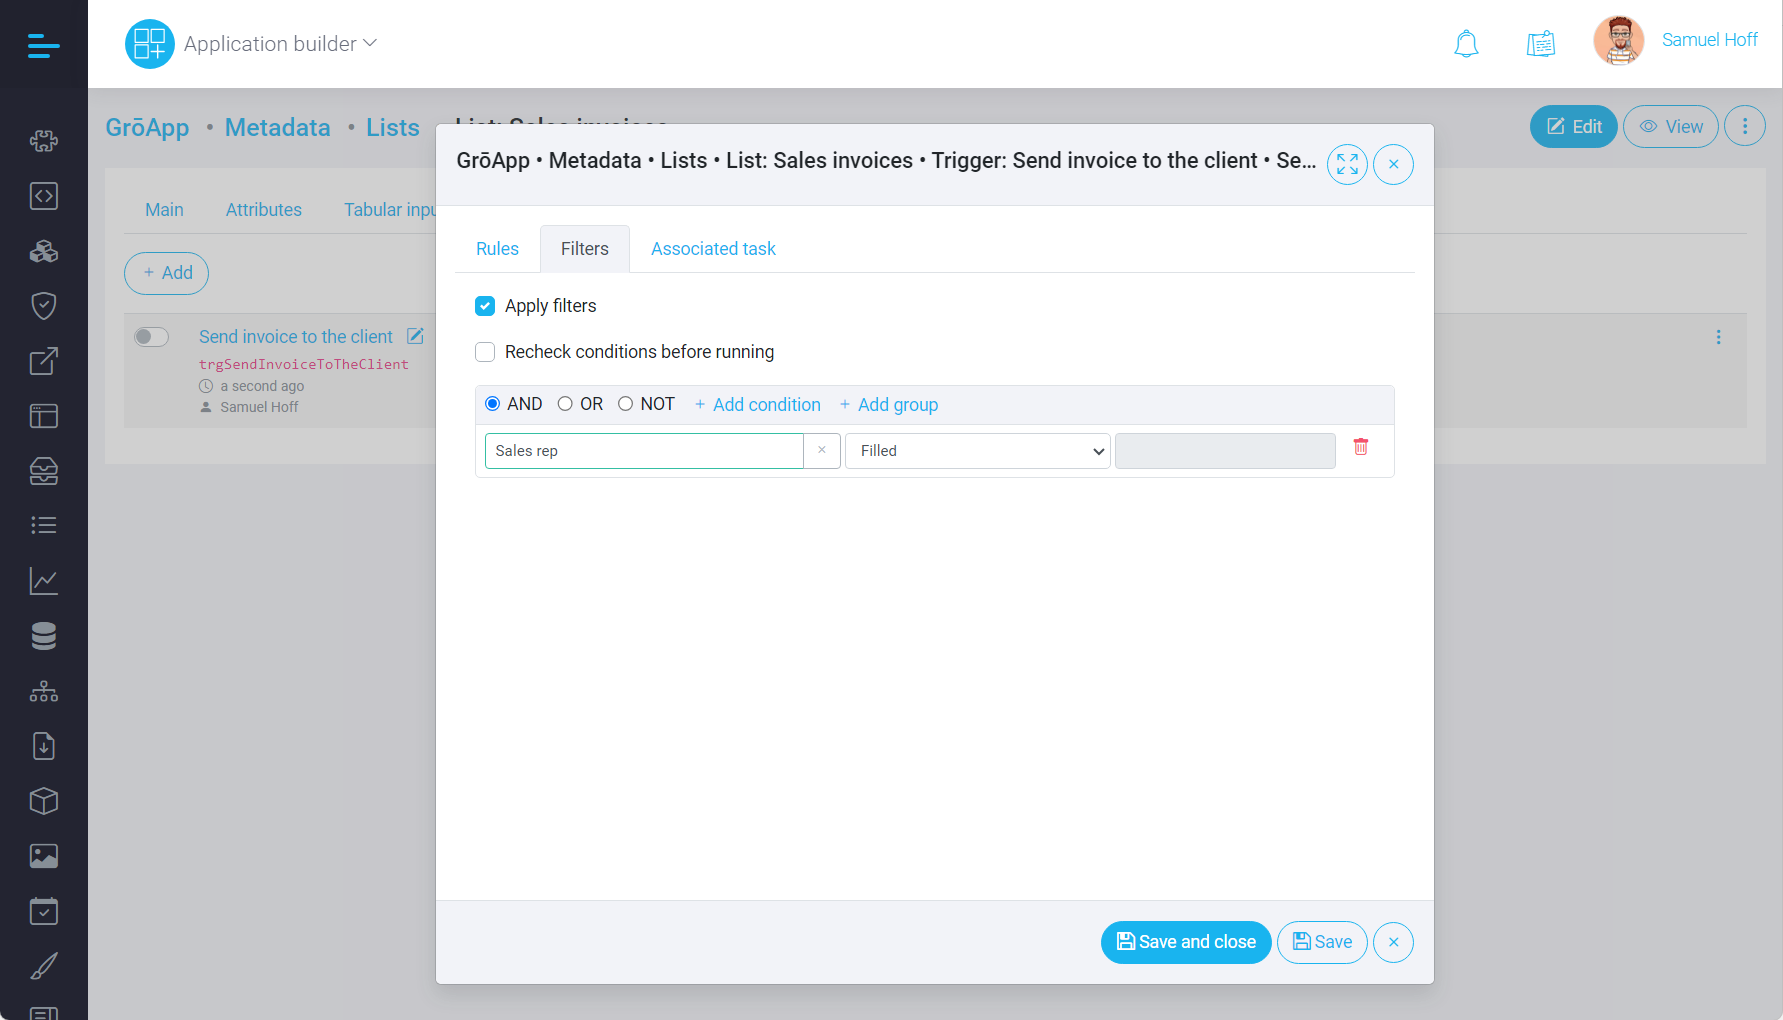
Just as a 'Thank you' letter only makes sense if the contract was not cancelled, and an appointment notification only makes sense if it was not nullified by the client. This is exactly what the filter tab is used for when creating triggers.
By creating groups and through the flexibility of filters, the system allows for quite complex logic.
But what if we changed the contract status, a task has already been created by the trigger?
The next day your 'Thank you' letter will be sent. But what if the client called and cancelled the contract, the meeting?
To address this situation, there's a parameter called Recheck conditions before running. The compliance with the conditions will be checked not only at the stage of creating a task by the trigger, but also at the stage of executing this task.
Associated task
This section configures the purpose for which the trigger was actually created. In this article, we consider user triggers created at the Implementation layer.
This type of triggers allows to perform the following list of actions:
- Send an email
- Create a notification
- Add an audit log record
- Start a business process
- Webhook
Let's look at each of them in more detail.
Send an email allows automatic email sending to both a system user and an external recipient.
Create a notification creates a notification for the system user, which is displayed in the Notification section in the header of the web interface and at the bottom of the mobile app interface. If the user is using the mobile app, they will also receive a Push notification upon receipt.
Add an audit log record creates a record in the audit log for the object. This type of trigger can be very useful if we want to set up additional data change logging for the object (who changed the appointment status, what it was before and after the change, etc.).
Start business process starts a business process that was previously created in the system. For example, if we want to automatically create a Timesheet when confirming an appointment using a trigger. For this, a business process should be created in which the logic for creating a timesheet based on an appointment is written and a trigger should be set up to launch this business process.
Webhook allows you to create an integration with external systems.
Given that sending emails is the most common use of triggers, let's look at this in more detail.
It is possible to specify from which email profile the email will be sent.
In this example, we want to automatically send timesheets to clients. We assume that the timesheet object has already been created and has a file attribute. This attribute already contains the PDF file that we want to send to the client.
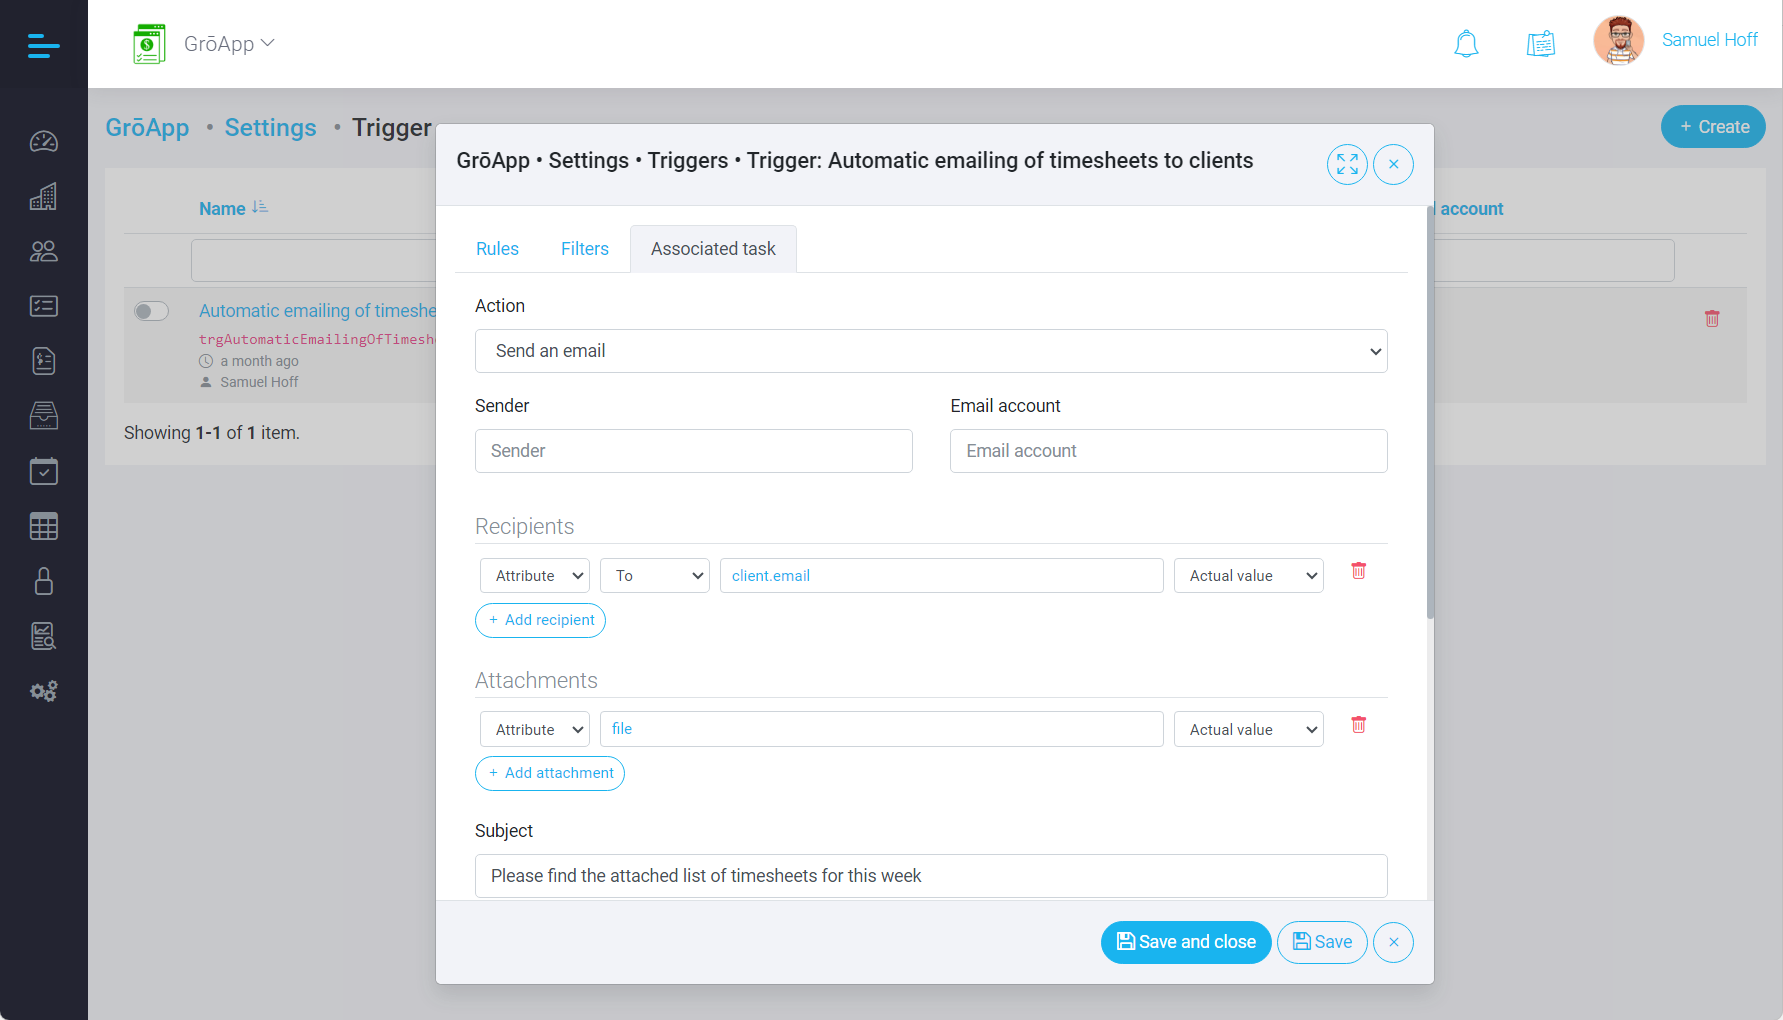
In the Recipients section, we specify to whom this email should be sent. It can be sent to:
- External recipients, whose addresses are stored in the database
- Internal system users (in this case, you can simply specify the user)
- You can also manually specify a set of email addresses to which this email will be sent.
This section allows you to flexibly configure the To, CC, and BCC recipients of the email.
If only BCC recipients are specified, the email will be sent to the sender's address and all recipients will be added to BCC.
The Attachments section allows you to specify attributes that contain files to be attached to the outgoing email.
The last sections allow you to set the text of the email to be sent.
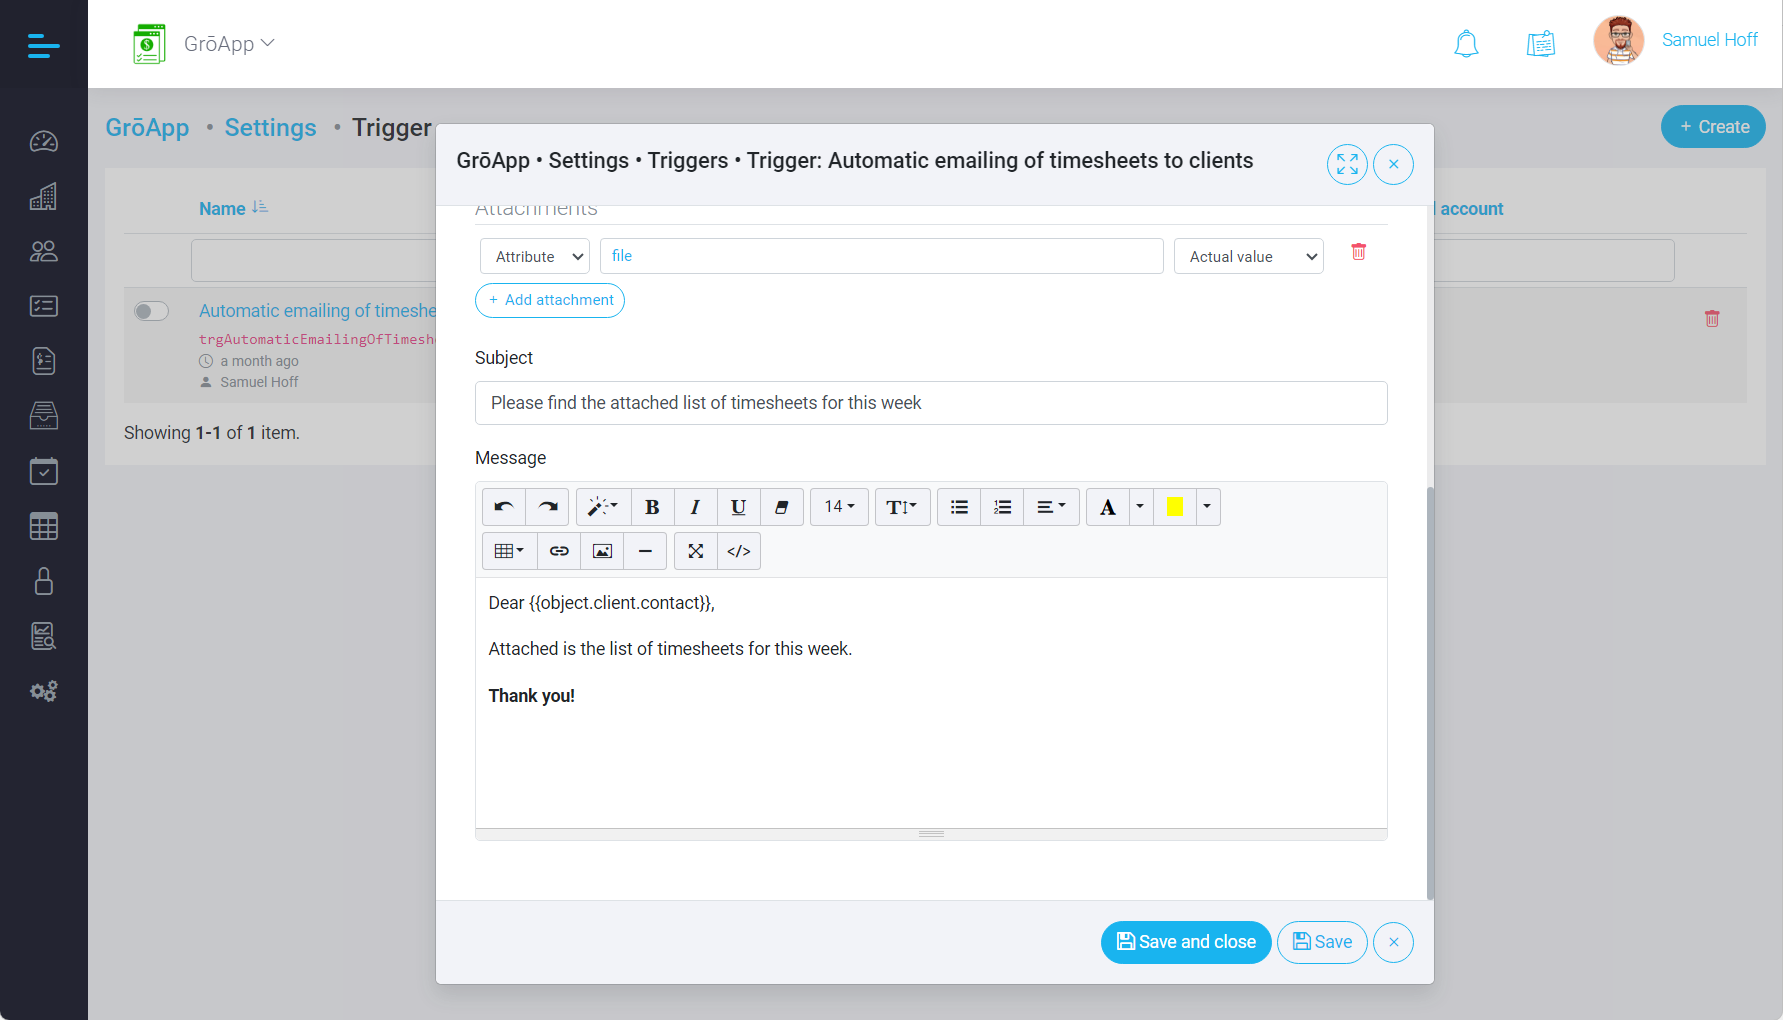
In the text and subject of the email, you can use parameters. Of course, the parameters must somehow be related to the data object for which the trigger is being created. For example, you cannot query another list not related to the data object and use fields from this list in the text of the letter.
The following prefixes are allowed for the attribute fields and for the message template:
- <no prefix> - current attribute value
- @ - previous value
- # - new value
How to use prefixes?
We want to send a message to the person responsible for the project when the deadline is changed.
In this case the Message will be as follows:
Please note that the deadline for your project has been changed.
Previous deadline: {{@deadline}}
New deadline: {{#deadline}}
You might be wondering about the distinction between the New value and the Current value in this context. The Current value refers to the existing value of the attribute. The New value, on the other hand, is the value of the attribute after a change has occurred.
If this notification is sent a day following the change, it's possible that the attribute could have been modified multiple times by the point of sending.