Roles
Updated on Jun 18, 2023 5 minutes to readOverview
When developing a software product, there's often a need to limit the user's interactions with data. For instance, it might be necessary to permit only the viewing of list items, to conceal financial information, or to restrict access to items under certain conditions.
In this respect, the metadata object Role plays a crucial role and aids in efficiently implementing these restrictions.
Role Creation
To create a role, navigate to the Roles menu item and click the Create button. In the pop-up window, enter the name of the role. The Script alias field will be automatically filled. Afterwards, click the Save and close button.
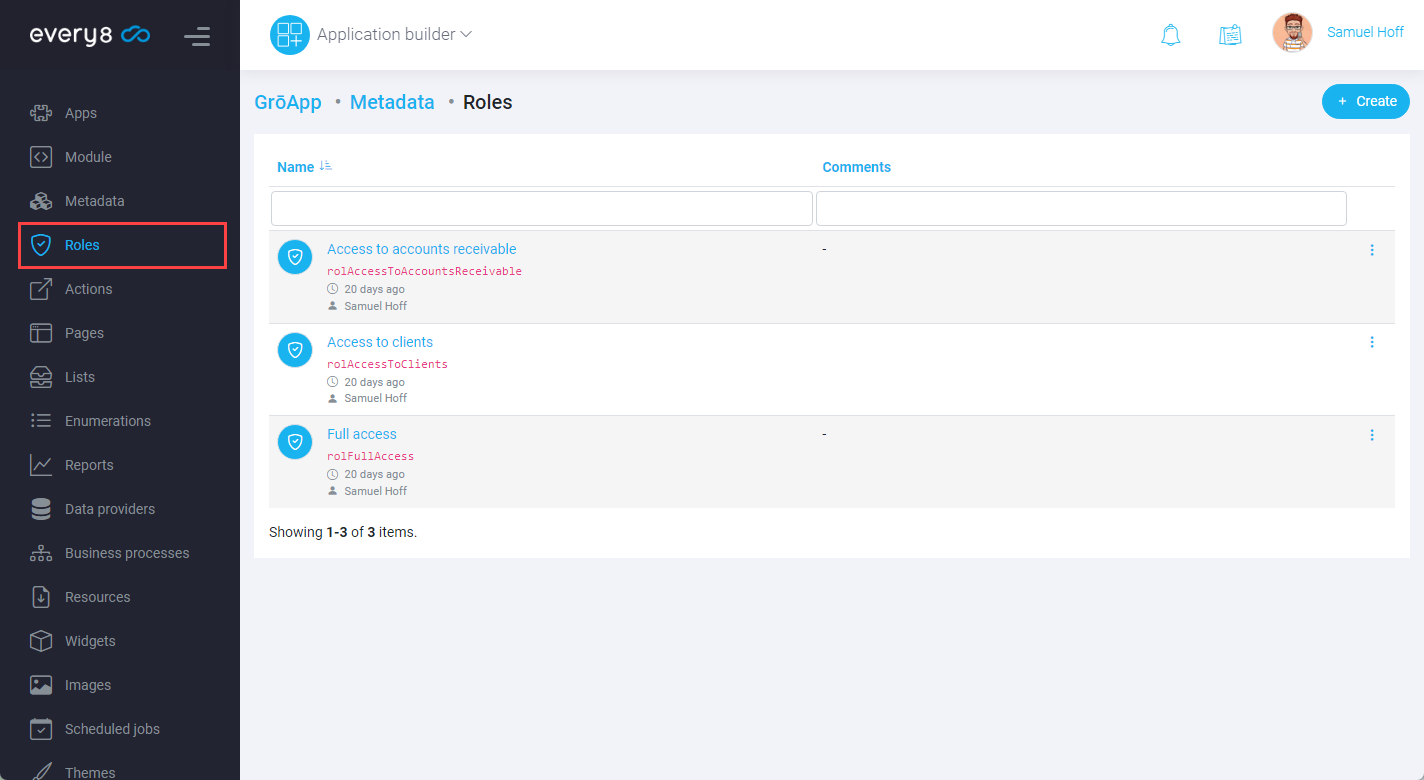
It is recommended to give roles names that effectively describe the imposed limitations. This could be the user's job title, such as Cashier or Warehouse manager, or a description of the restriction, like View only sales documents, etc. For a role with no limitations, it is recommended to use the name Full rights. Avoid using the name Admin as it's reserved for the account administrator and may be confusing.
Access Restrictions
Configuration of access restrictions is done on the Settings tab of the metadata object. To enable limitations, switch the Limited access toggle to the active state. After this, the system will display a table with a list of roles and available restrictions depending on the type of metadata.
Pages, Enumerations:
- View - Allows viewing and using the metadata object
Reports, Data Providers:
- View - Allows viewing and using the metadata object
- Export - Allows exporting data in xlsx, pdf format
Lists:
- View - Allows viewing and using list entries
- Insert - Allows addition of records
- Update - Grants access to modify existing records
- Delete - Allows deletion of records
- Export - Allows exporting data in xls format
- View audit log - Allows viewing the object's change history
- View refs to object - Grants access to view other entries where there are references to the current object
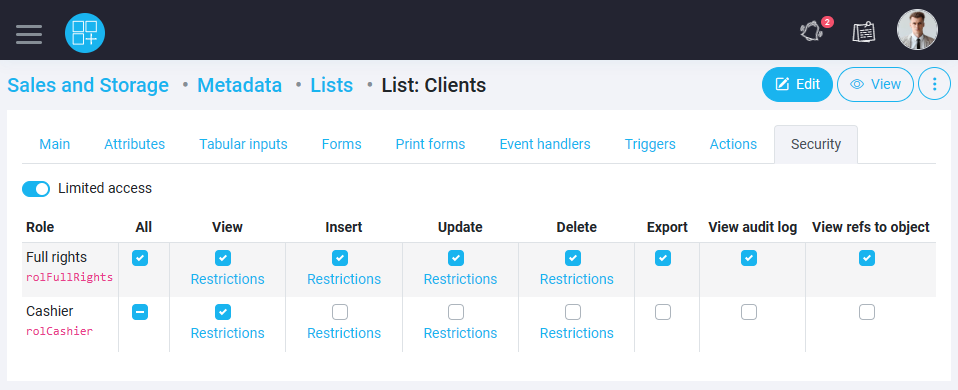
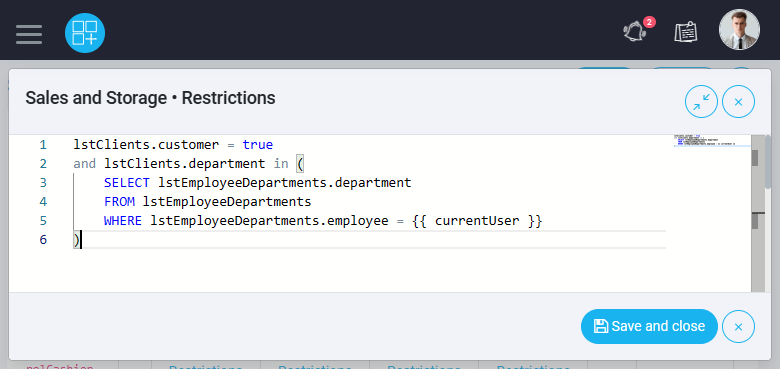
In addition to action-type restrictions for Lists, it is possible to assign record-level restrictions to object records.
To do this, check the box in the required action type and click the Restrictions link. In the window that opens, we can define restrictions using Query script.
Role Assignment
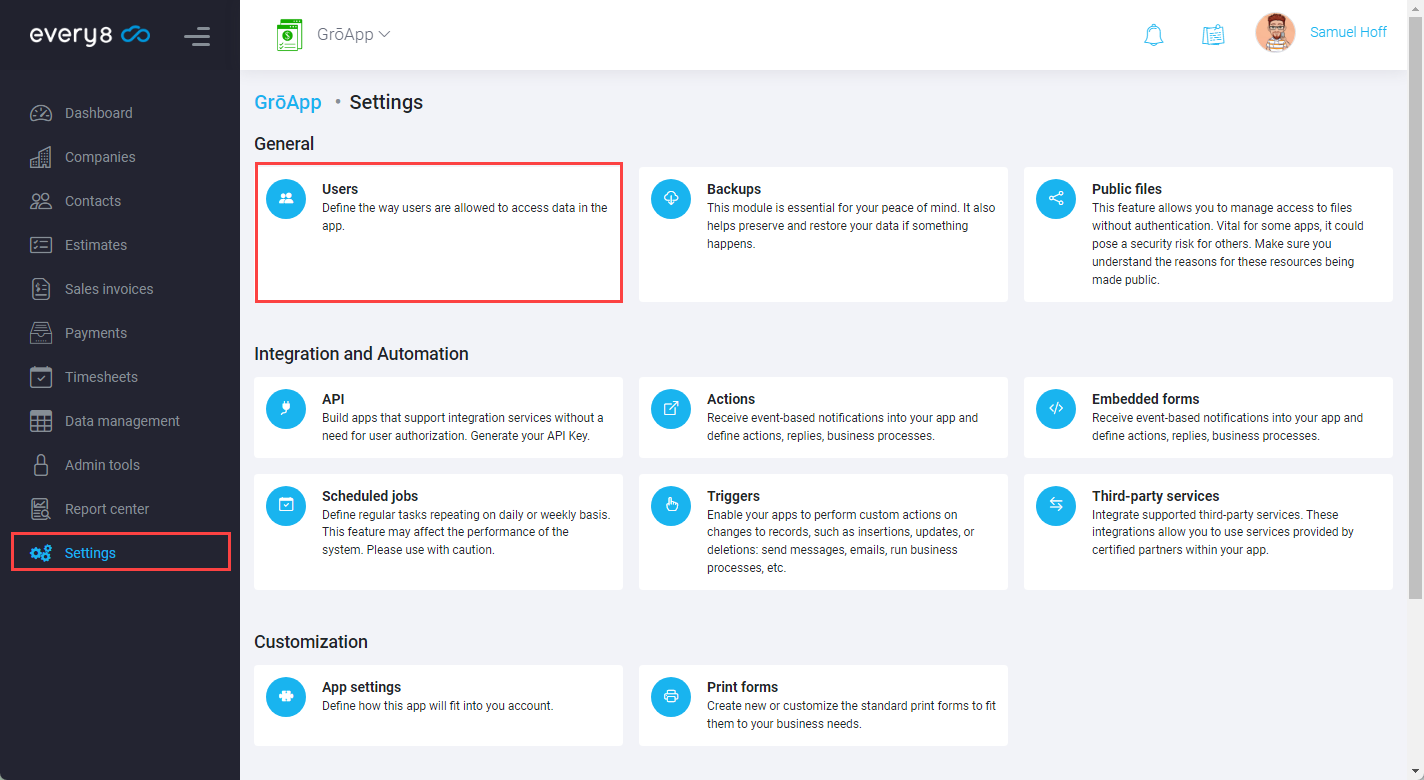
Assigning roles to users is done through the Implementation layer of an app. To do this, navigate to the application settings and select Users under the General group.
In the list, select a user and in the editing form, check the boxes for the roles to be assigned.
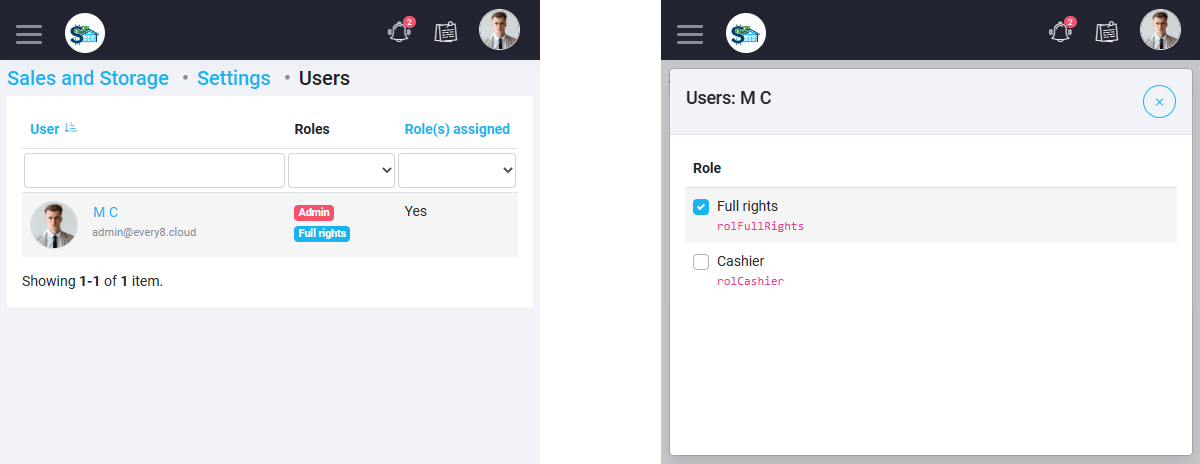
When a user is assigned multiple roles, restrictions are combined through the "OR" operator. Thus, for example, if one of the roles allows editing, without record-level restrictions, then the conditions for the other roles will be ignored. In cases where several roles have record-level restrictions, they will be combined into a condition:
WHERE <condition role 1> OR <condition role 2> OR ...
Home Pages
Another use case scenario is assigning a home page to a user based on their role.
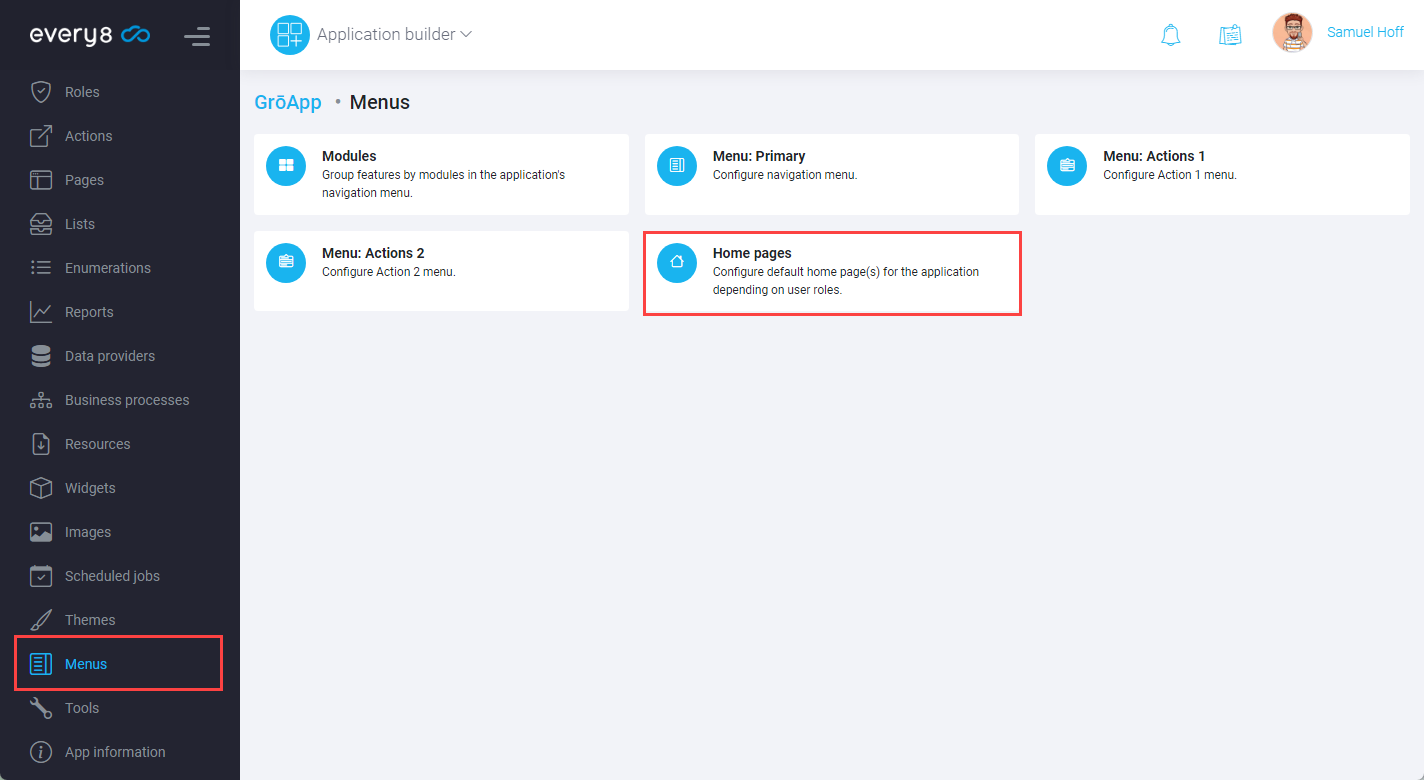
To do this, navigate to the Menus section in the Application builder, and select Home pages.
In the next form, you need to add a new line specifying the role and the metadata object to which the transition should occur.
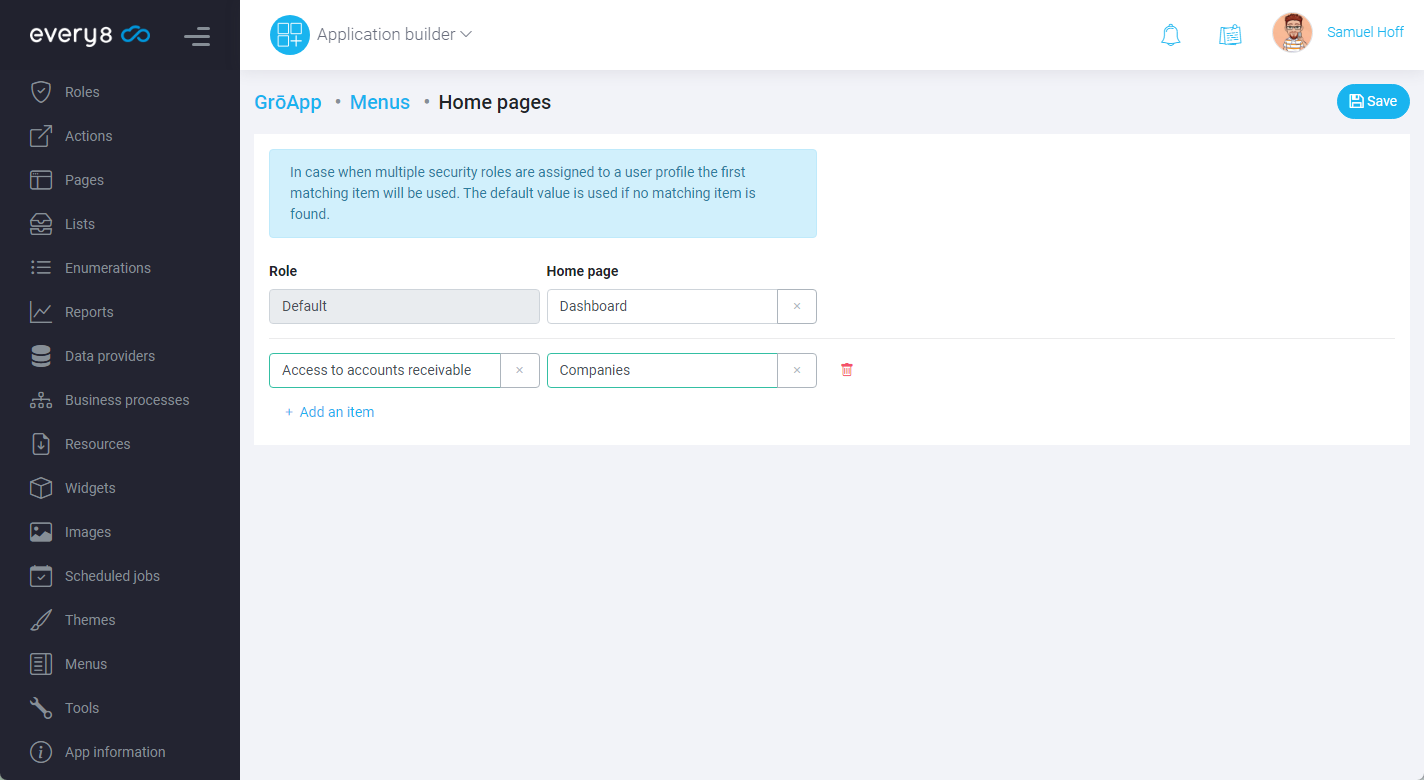
If a user has multiple roles assigned and a separate home page is specified for each role, the active page for the user will be the one that is higher in the Home pages list. To avoid confusion and unexpected behavior, especially when there are many roles, it is recommended to create a separate interface item for each role, for example: Accountant home page.